How to write a blog post using WordPress?
You have been accepted to submit blogs on a website. What next? In this article, I am going to explain how to submit articles or blog posts on a website using wordpress. Most likely, you have been provided contributor level access if you are new to a website, which means that you will be able to submit your articles but somebody will review it before posting the content on their website. You will probably be able to get a higher level of access over a period of time by submitting high quality content and gaining the trust of the organizers.
How to blog using contributor level access on a WordPress site?
Lets dive straight into the steps on how to create your post once you have contributor level access. I am going to explain the steps using pictures for your better understanding. I am assuming that you have already created an account on the website and have ‘Contributor’ level access to the website.
Login to Website without ‘Contributor’ access in WordPress
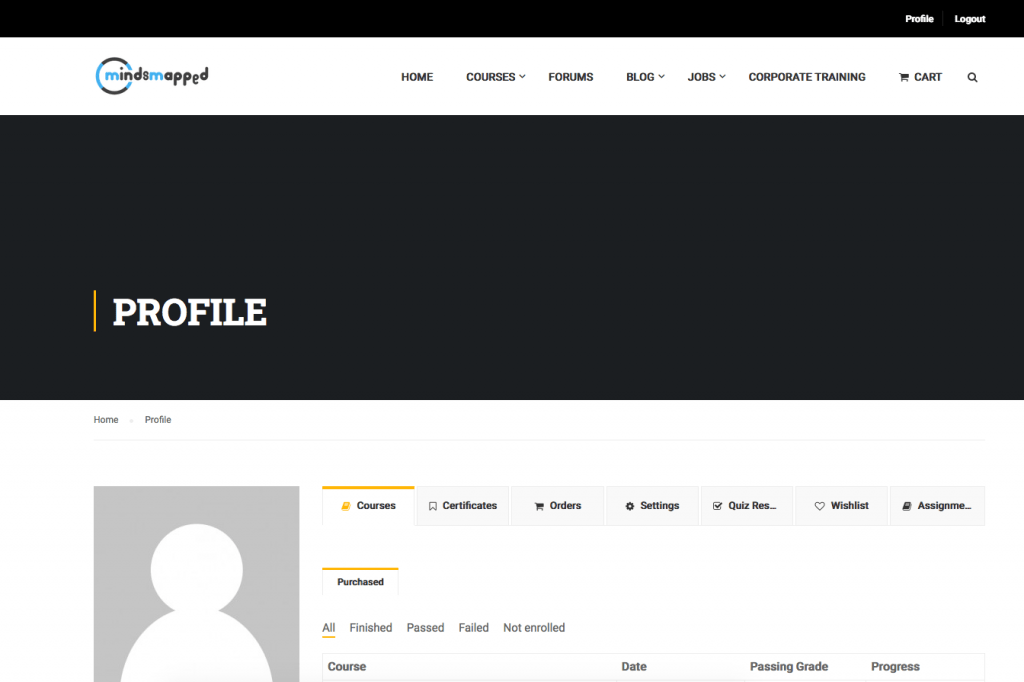
This is how your account page looks when you login to the website without ‘Contributor’ access.
Login to the website with ‘Contributor’ access in WordPress
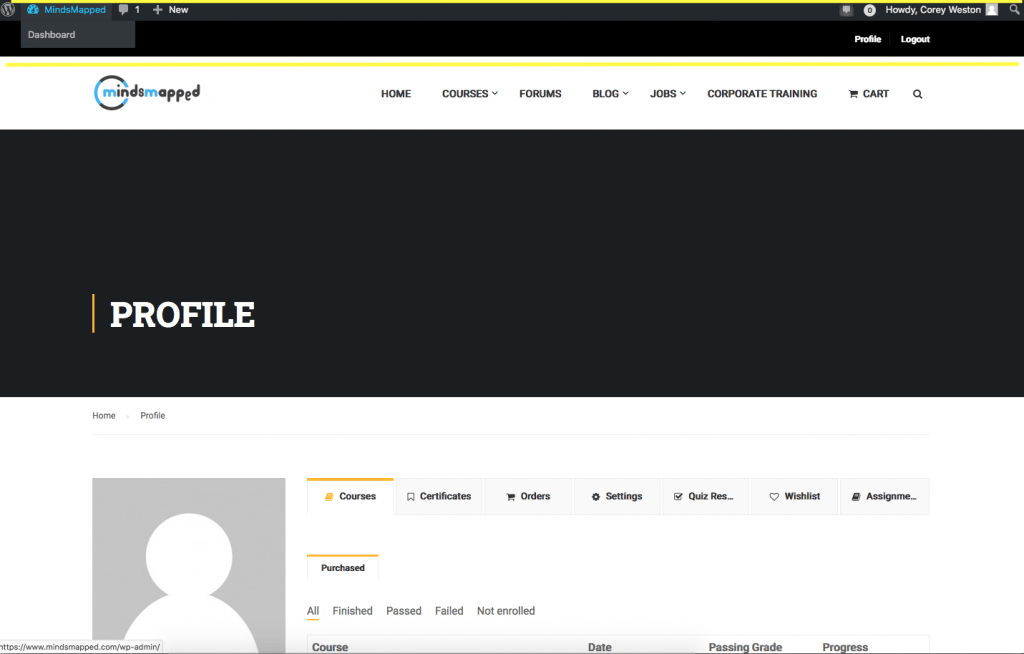
This is how your account page looks when you have ‘contributor’ access. Hover your mouse on ‘Mindsmapped’ on the top left and Click on ‘Dashboard’.
Goto the WordPress Dashboard
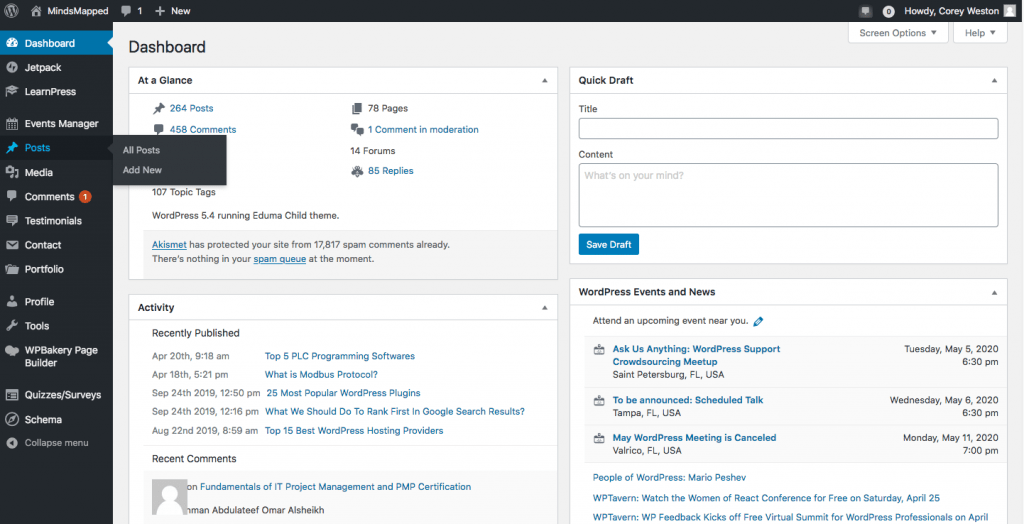
On clicking the Dashboard, you will see the screen below. Hover the mouse on ‘Posts’ on the left side menu and click on ‘Add New’.
Enter the WordPress Editor Welcome Screen
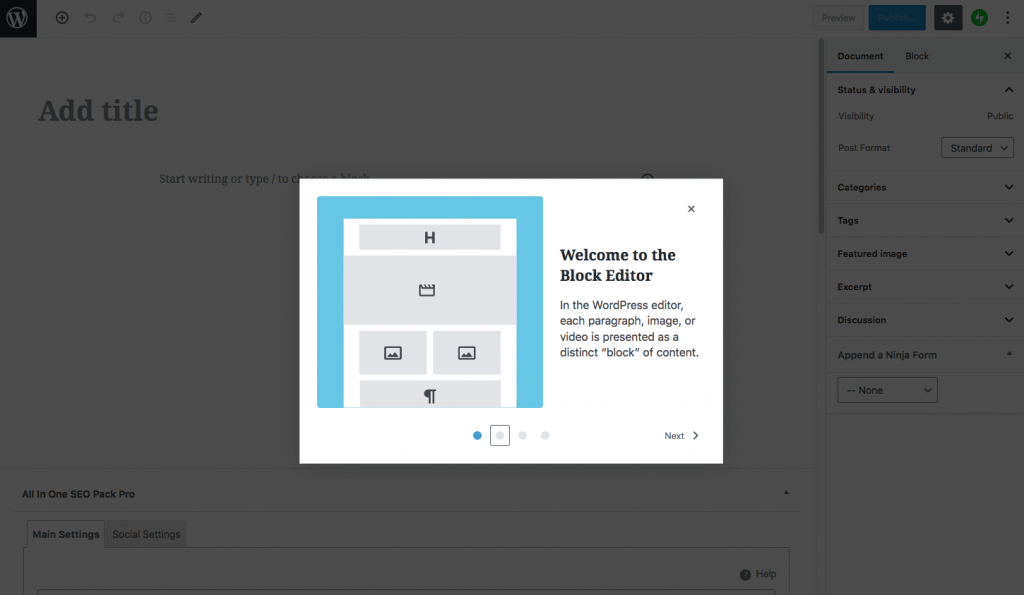
You will get the Welcome Screen for the Editor page as shown below. Click on Next until you see ‘Get Started’ and click on ‘Get Started’.
WordPress Editor Screen
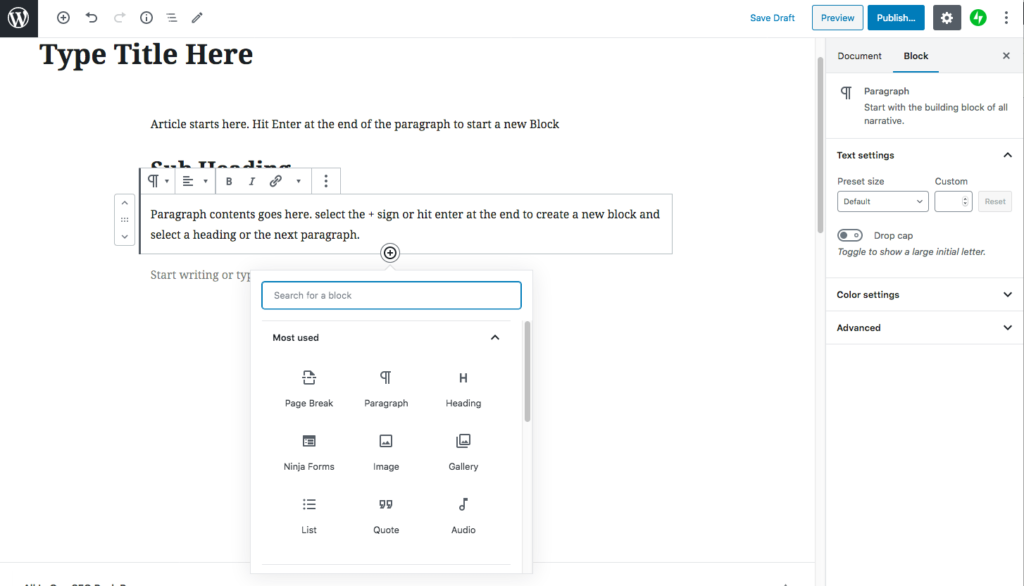
Now you will see the Editor Screen, where you can type the ‘article title’ in the ‘title area’ and type the contents in the paragraph section below the title area. Remember to select the ‘block’ section on the right side menu. When you want to type a new paragraph or add a new sub-heading, click ‘enter’ on the keyboard and you will see a ‘+’ sign, which will give you an option to select a new heading or a new ‘paragraph’.
Remember the high level headings should be ‘H2’ and sub-headings should be ‘H3’. For example: If the articles title is, “Tourist Places in Florida”, your H2 headings will be “Miami”, “Key West”, “Fort Lauderdale” etc and your H3 Headings could be, “Bay Side Market Place”, “Miami Seaquarium”, “Jungle Island” etc. Any titles within that could be H3 tags and so on. But try to give H2 tags and H3 tags and avoid going below that level.
Provide Meta Title and Description
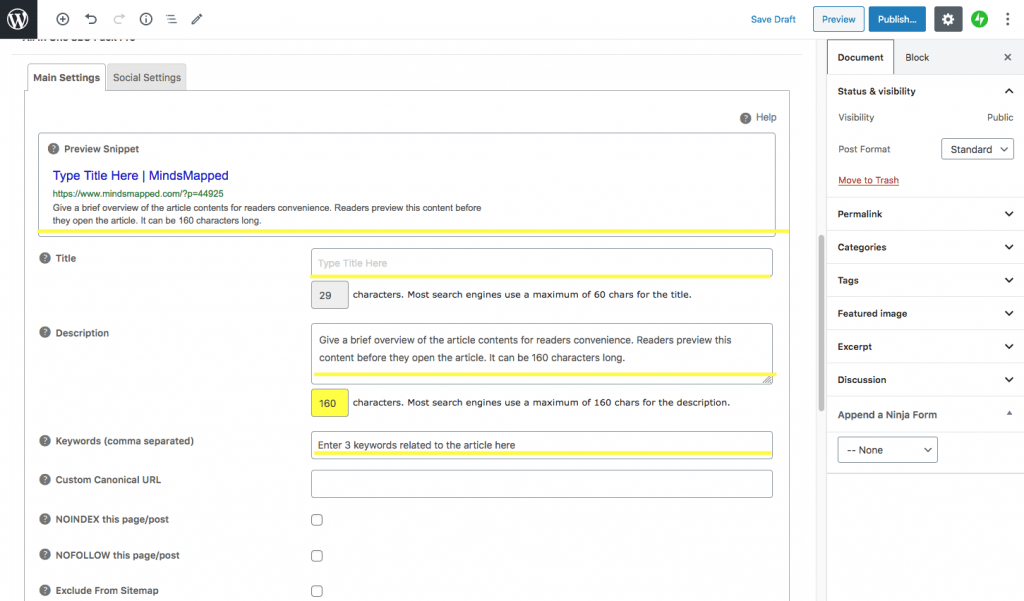
Meta tags are snippets of text that describe a page’s content. Meta tags are essentially little content descriptors that help tell search engines and gives users a preview of what a web page is about.
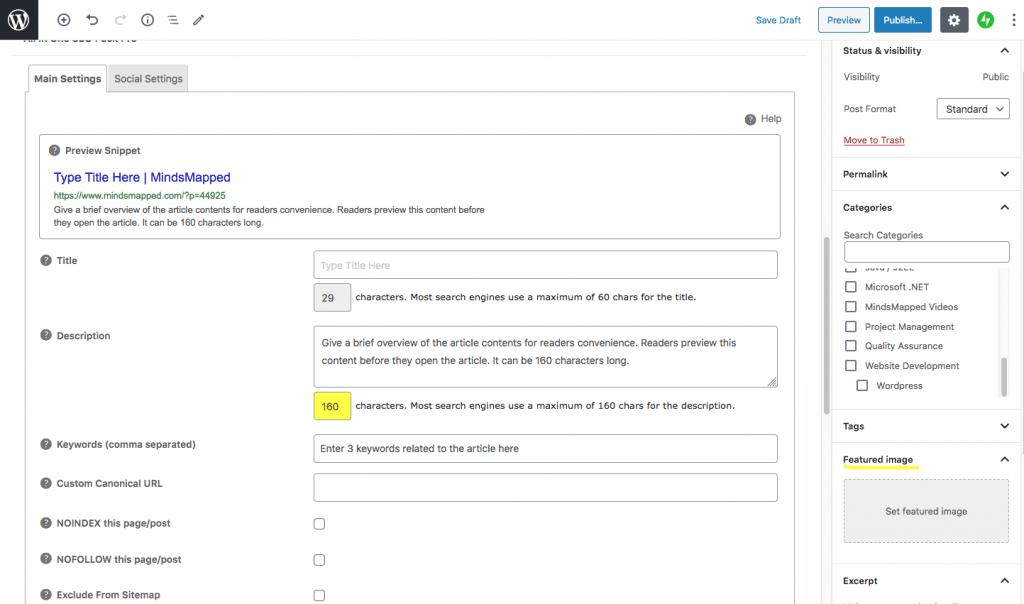
Once you complete typing your article, you can scroll down below to provide ‘Meta Title’, Description’ and Keywords. The preview snippet shows how your article will be shown in google results when somebody searches for your topic. The title could be the title of the article itself. The Description should not be more than 160 characters and should give a brief overview of the article.
Also provide three keywords for the article. For example: If your article title is “Agile vs Waterfall Methodologies”, your keywords could be ‘Agile vs Waterfall Methodologies’, ‘Difference between Agile and Waterfall Methodologies’, and ‘Advantages and Disadvantages of Agile and Waterfall Methodologies’. There is no hard and fast rule to define title, keywords and description.
Select Article Category
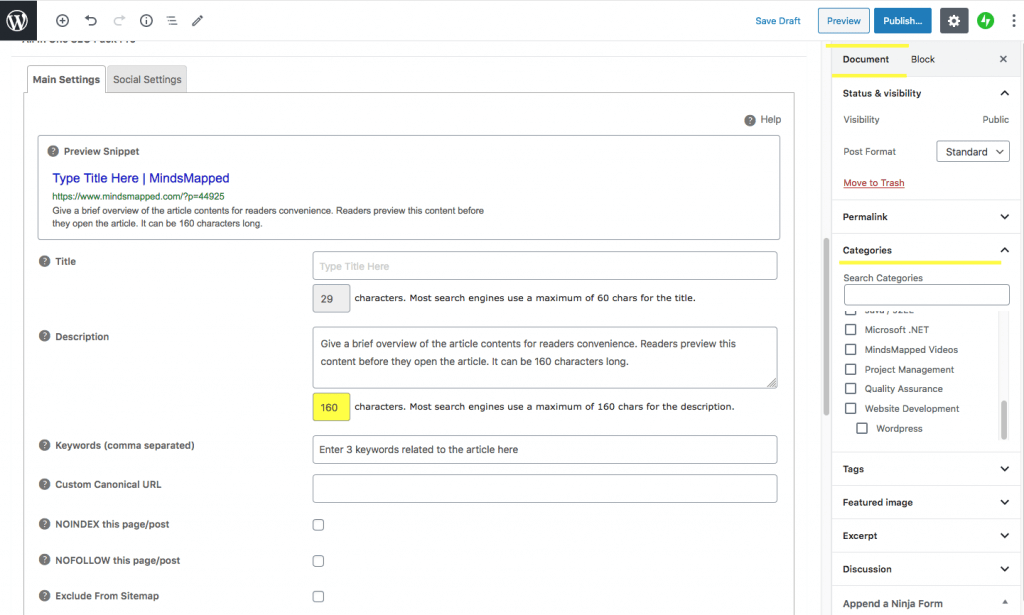
Once you have completed the article and defined the meta title, description and keywords, you can switch the from block editor to document editor section by clicking on the document option on the top of the right side bar shown in the image below. Once you select the document editor mode, you will be able to select the article category.
Select one option that is relevant to your article within the categories section.
Provide Excerpts
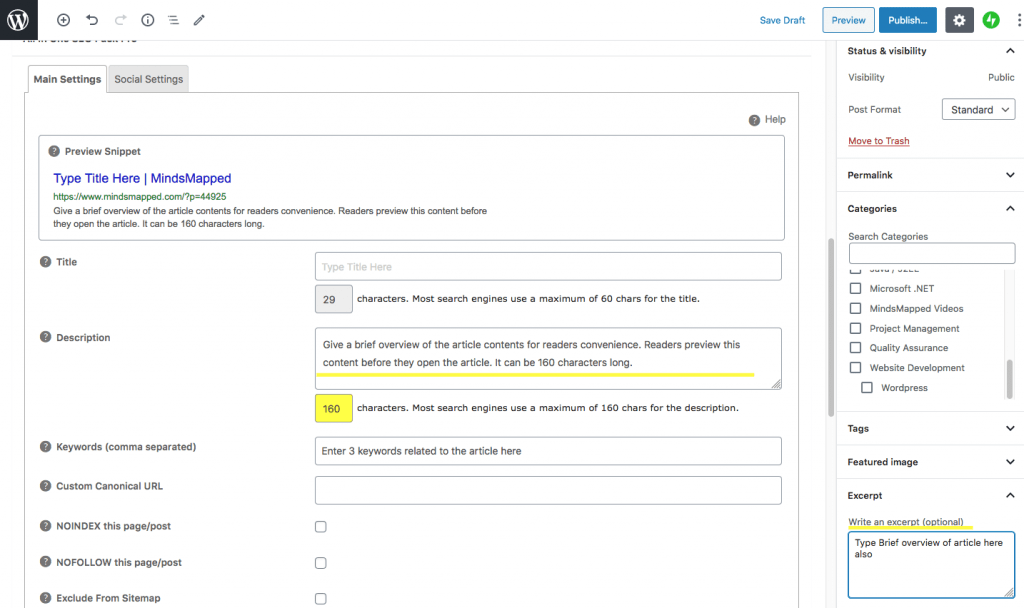
Excerpts are the short extract from your post. You can re-phrase the meta title description and give a one-liner for your excerpt. Providing excerpt is optional but good practice since it increases the chances of your article to be shown to more number of people.
Setting up an Image for the Article
The next step before publishing the article is to add an image to the article. A picture is worth more than 1,000 words when presented within a blog post (or page).
You can add an image using the ‘Set Featured Image‘ option in the right side bar. The featured image will be used as a preview in other pages of the website. Make sure you name the image with the article title before uploading. For example: If your article title is ‘Introduction to WordPress’, name the image file (JPG or PNG) as ‘Introduction to WordPress.PNG‘
You can get relevant stock photos for free from websites such as pixabay, unsplash, pexels or other websites that offer free stock images. Image size for blog post should be 875 x 440.
Or you can create your own images for free using canva. This is the easiest and recommended option.
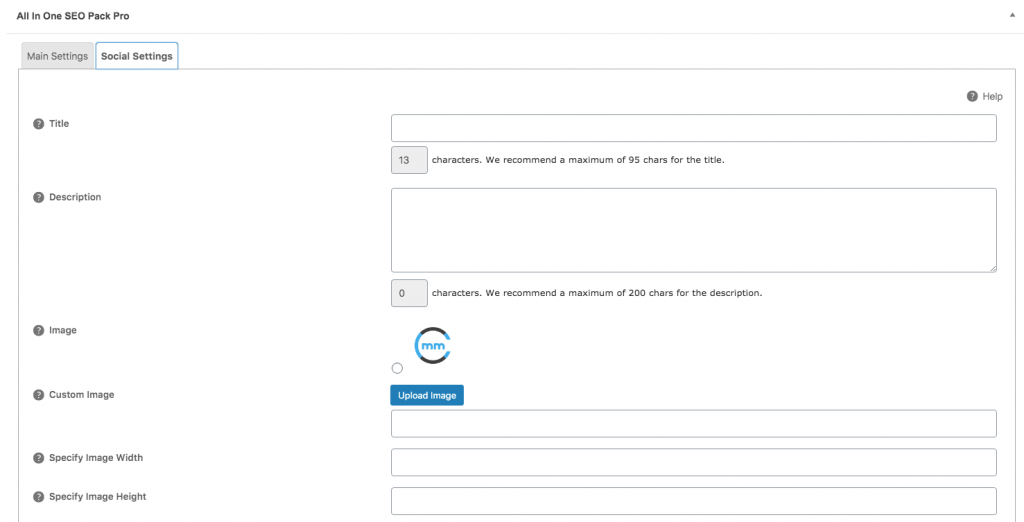
Also upload the image in the Image section in the Social Settings tab. This image will be shown as a thumbnail for your article while sharing in social media (facebook, linkedin etc.). Scroll down further to upload the image for twitter again. The ideal resolution for the social media image should be 600 x 315 pix but the image used as featured image (875 x 440) will just do fine.
If you are using windows pc, you can resize an image from the Windows Photo Gallery by click “Edit,” from the Properties group, and then click “Resize.” If you are using a mac, open the image using “preview’ app, click the Show Markup Toolbar button and then click adjust size button.
An image uploaded in the social settings tab helps illustrate a point and would be the thumbnail when your article is posted on social media sites.
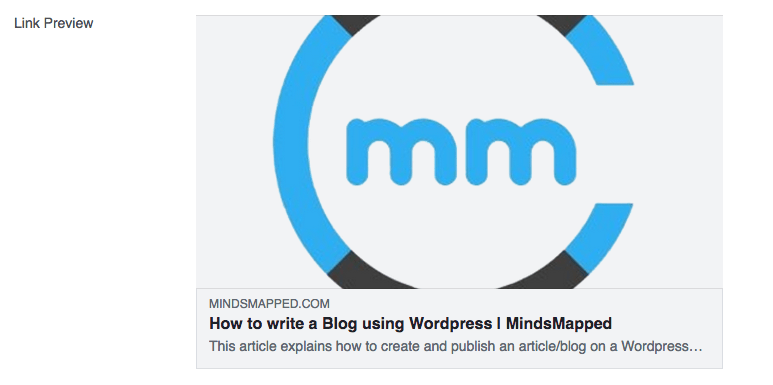
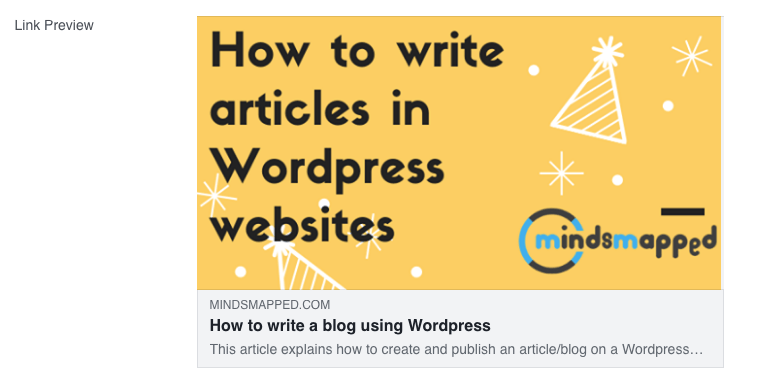
Image Title, Alt Text, Caption and Description
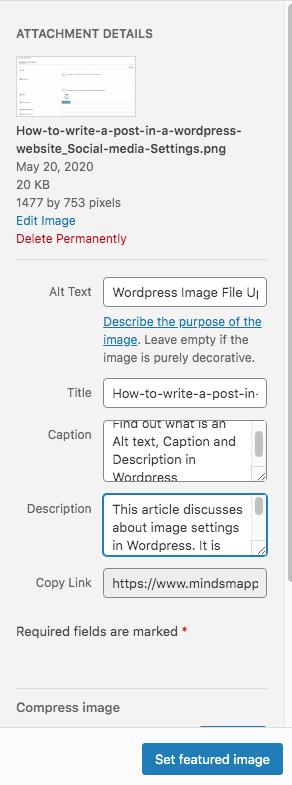
Alt Text, Caption and Description are as important as title for the image uploaded. Providing appropriate information here helps users to find your articles when they search in google or social media.
Alt Text is short for “alternative text” or “alternate text.” for the title. For example: If title is “Introduction to WordPress”, my Alt text could be “What is WordPress”.
The caption field is easy to understand . It describes what’s in the picture for people who can see the image and want to know more about what’s in it.
The description field explains the article contents and can hold as much information as you want. It’s easier to just copy the mega description information into this field.
Review for Grammar Errors and Spell Check
Your post is now ready to be published. Proof read it once and make sure your article is at least 2000 words. It is good practice to grammar check the article by installing grammarly on your browser. Grammarly ensures there is no spelling mistakes or grammar errors in the article.
Review for Plagiarism
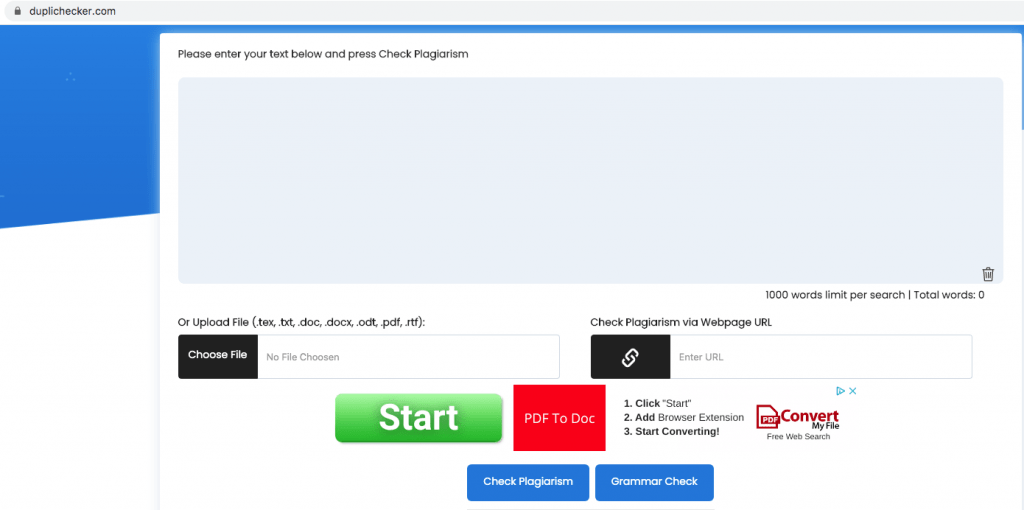
Knowingly or unknowingly, you might have contents in your article that might be already present on other websites. Creating duplicate contents tarnishes the image of the author and the website. If you would like to provide references to contents from other websites such as PMI, IIBA, ISTQB etc, you can mention that by giving reference and credits to the original source. To make sure that there is no plagiarism in your contents, copy and paste the contents of your article in duplichecker and click on ‘check plagiarism’. Duplichecker will point out the sentences that are considered to be duplicate. You can re-phrase those sentences and re-work on the article until your plagiarism score is zero.
Publish Article
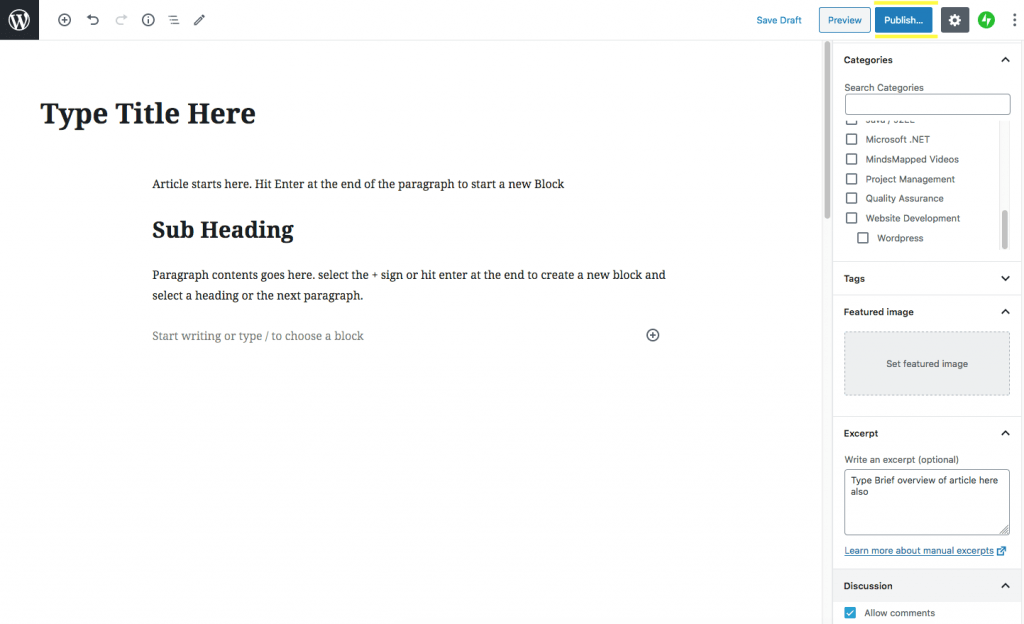
You are now to ready to publish. Click on the publish button found at the top of the right side bar.
Submit for Review
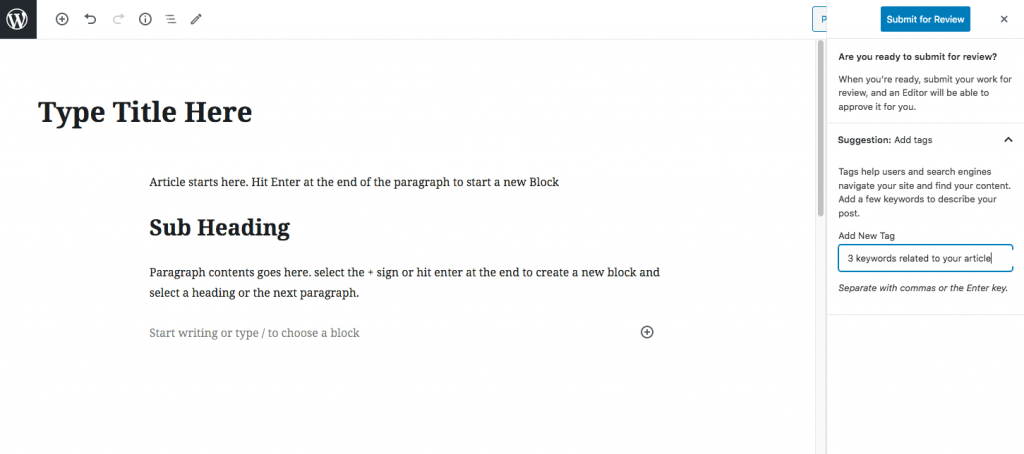
Once you click on Publish Article, you will get a confirmation screen asking if you are ready to submit for review. You can also provide the three keywords provided earlier in the tags again.
Moderator Review
Your article is now in the queue of a moderator for review! Wait for a day or two until you hear back from the moderator in case of any feedback to polish your article or your article will be published if everything looks good. If you dont hear back from the moderators within 2 days or the article ios not pulished, send a reminder message using the contact form
Congratulations
Your article is now live. You are now among the 1% that post contents on the internet as opposed ot the 99% who read contents on the internet. Your voice will be heard by the remaining 99%. You should be able to post the link your article on your social media accounts and gain more visibility.
Happy blogging!
If you have any questions, please post in the comments section below!

