How to Install Unified Functional Testing (UFT) on Windows OS?
HP Unified Functional Testing tool comes with a default 60 days of trial/demo version.
There are two types of license:
- Seat license – The license that is particular to the computer on which the tool is installed.
- Concurrent License – Network based license which can be used by several users at a time.
Once the demo period is over, we need to purchase any one of the license to continue working with the tool.
Step by step instructions to install the “UFT 12.00” on Windows
Step 1: Latest version “UFT 12.00” can be downloaded from HP website.
Here is the link “http://support.openview.hp.com/downloads.jsp”
Step 2: Click on “Try UFT Now” to download the UFT tool.
Step 3: The next window that appears is “Software download Terms of Use”, read all terms and conditions and click on “ I Agree” button to proceed.
Step 4: Once you agree to the terms, one more window with four download link. Use the appropriate link named as “Software, HP UFT 12.00 MLU (T6510-15082.zip) to download the tool. As the size is 1.49 GB, it might take some time to download and it also depends on the speed of broadband.
Step 5: Once the download is completed, locate the downloaded UFT 12.0 file to appropriate drive space with 1 GB space approximately.
Step 6: Unzip the zip format of downloaded “UFT 12.0” and execute the “Setup.exe” file.
Step 7: After execution of “Setup.exe” file, the next execution window will have several options. Select “Unified Functional Testing Setup” from the list of options.
Step 8: “HP Unified Functional Testing 12.00” wizard will appear, click next to proceed further.
Step 9: The next window is “License agreement”, where you need to click on “I agree” and proceed with “Next button.
Step 10: The next window is “Customer Information” where you need to mention your name and organization and proceed with “Next button.
Step 11: The next step is “Custom Setup” to customize the window with appropriate add-ins as per the application or project requirement which you are going to test using UFT 12.0.
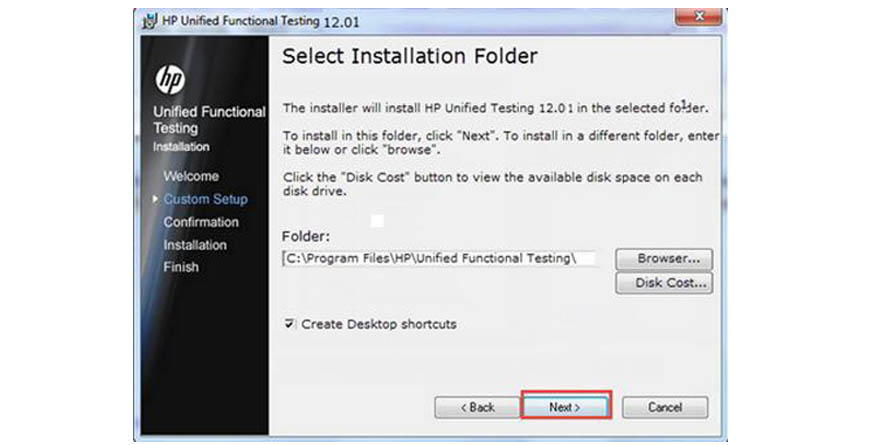
Step 12: The next step is, “Select Installation Folder” window, where you need to drive the file to specific path, where you want to install the UFT 12.0 tool. Click “Next” button to proceed.
Step 13: Next to the “confirm installation” window pops up, click “Next” button to confirm the installation. The installation process starts which may take some time to finish.
Step 14: After the successful installation, you will get the window with the message saying that “HP UFT tool was successfully installed. Click on “Finish button to confirm.
Step 15: After successful installation “Additional installation Requirements” window pops up. Where you need to select all the options and proceed. But while selecting the “Run License Installation Wizard” do not forget to decide whether you want to go for trial 60 days version or Licensed version.
Trial version: In case if you want to install the trial version, do not select the “Run License Installation Wizard”.
Licensed version: In the case of or Licensed version, select the “Run License Installation Wizard”.
After the successful installation process, restart the system. The installed UFT 12.0 can get from
Start >All Programs > HP Software > HP Unified Functional Testing. Or you can also create the shortcut on your desktop.


